Legend
When Bozo came to the island of Rookgaard, no one really understood why would he travel here. As suddenly as he arrived, he fell ill. In his dying breath, he asked to be buried in shallow grave, and to be buried fast, without any ceremony. Once he was put in the ground and buried, strange sounds were heard from inside the coffin... Few weeks later he was back in Thais denying ever visting Rookgaard, perhaps his graves hides a secret, one would need to get his hands dirty to discover?
Location
„Premium-side” of Rookgaard, the Skeleton Cave — in crypt below Bozo’s grave.
Dangers
Overworld: Snakes, Spiders, Poison Spiders (at the exit site)
Underworld: Skeletons, Rotworms
Tools needed
Shovel, Rope, Pickaxe, Torches (optional), Boxes (optional), Distance Weapons (optional) Machete (optional, for futher exploring the island)
Reward
Access to Southern part of Rookgaard isle, behind magical wall.
Solution
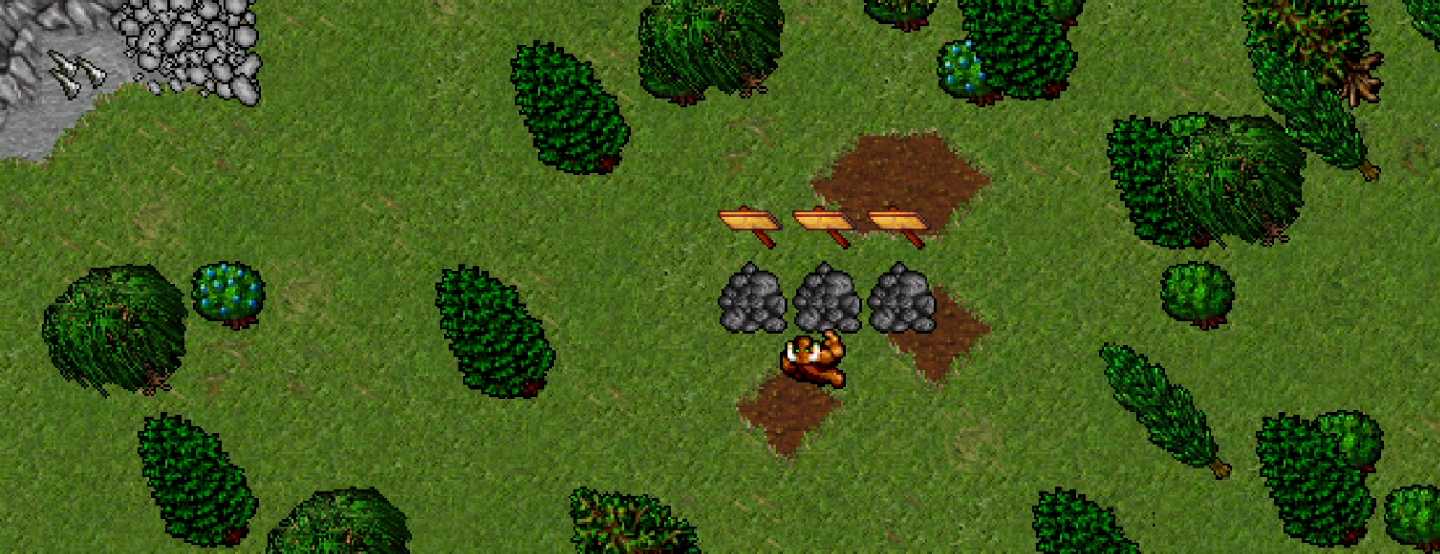
Step 1:
Use shovel to dig, and go down a level, then go down a level again. Enemies will be the Skeletons here, so be prepared to clear them before proceeding to next step.
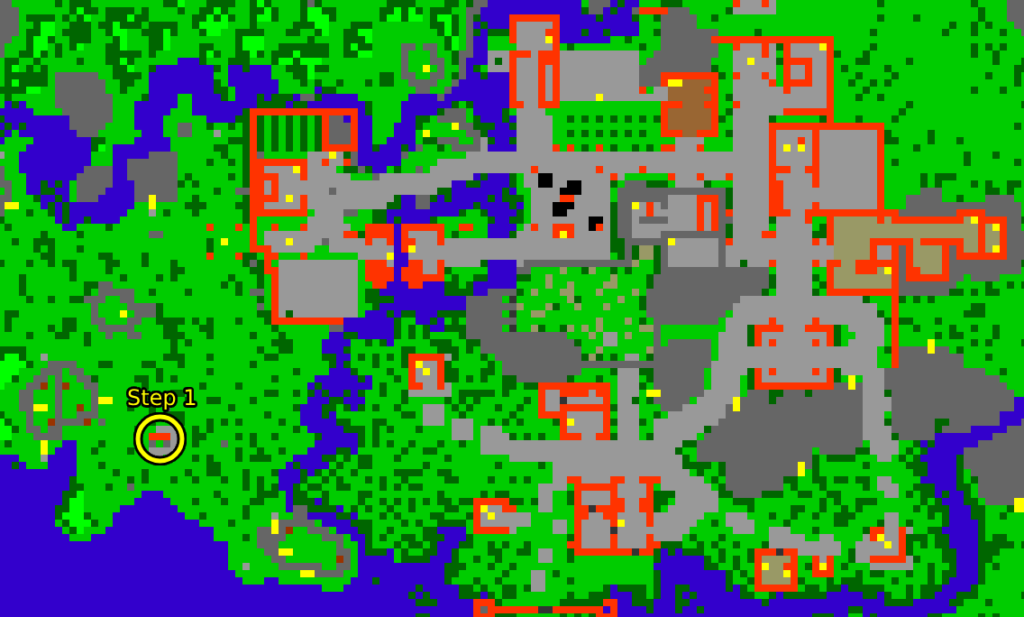
Step 2:
Use Pickaxe to dig, and go down a level, be careful, now enemies will be Skeletons and Rotworms in tight spaces, right at the drop down. If you’re not able to handle them with Melee I recommend using boxes and distance weapons.
The path will now open towards the Maze of Fury. There’s multiple rooms, with hidden digholes, hidden rope spots. However, they are just maze-rooms, with no additional rewards or hidden items.
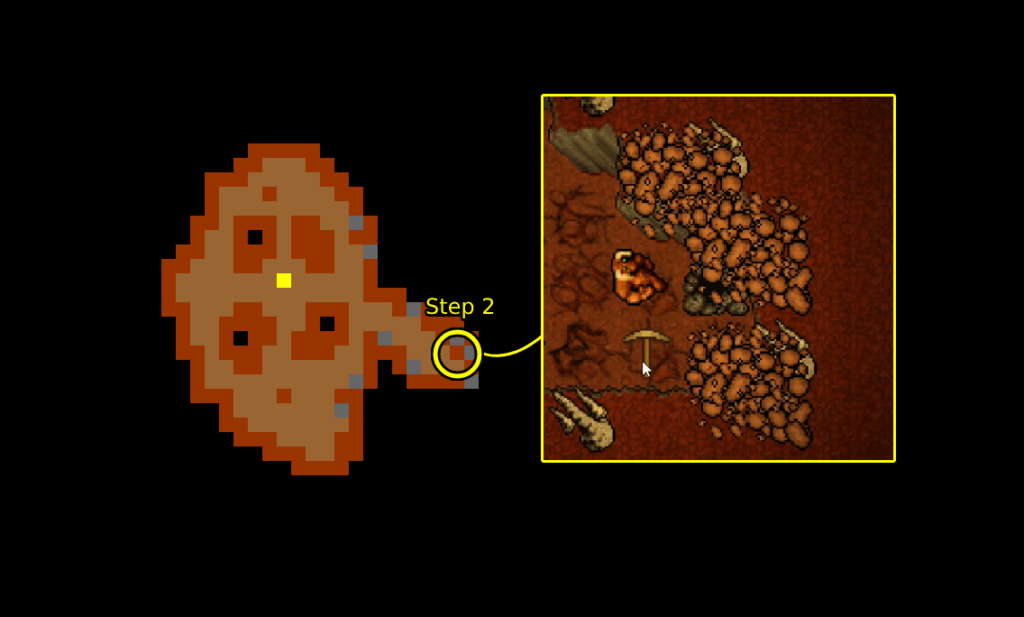
Step 3:
Once you are in Maze of Fury proper, head south to crossroad, and go left. Follow the corridor until opening, then head straight south once again, and use the pickaxe to open the path ahead.
You’ll find plenty Skeletons and Rotworms along the way to the dig point, use your best jugment according to your level and skills to either defeat all enemies, or just run straight to marked spot.
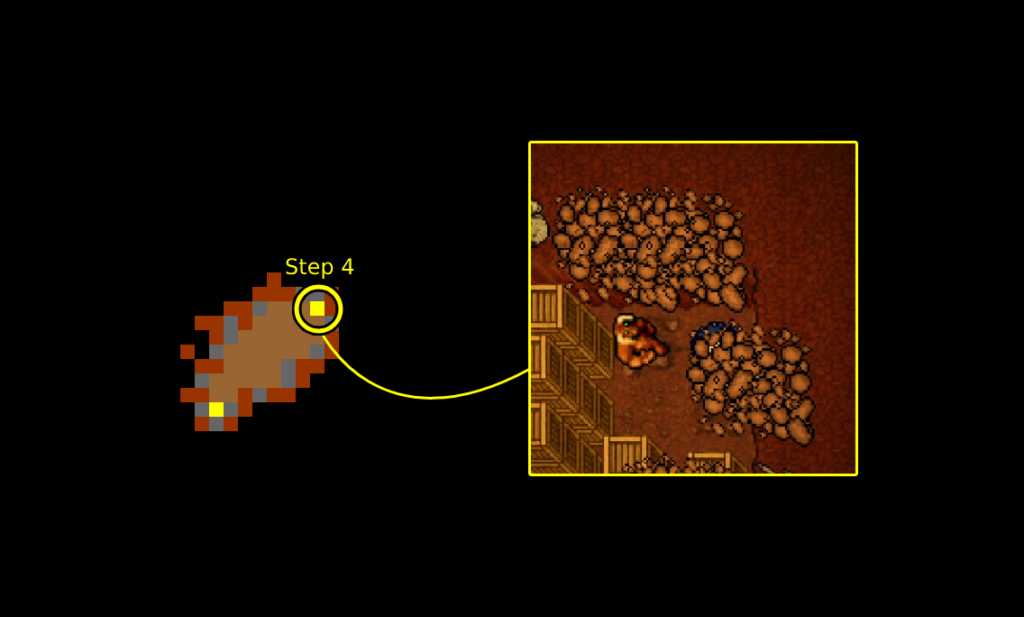
Step 4:
Once you’ve dropped down, you’ll find yourself in room full of boxes. This room is considered a 'Safe room’ as no monsters spawn here.
In the top-right most corner of the room, there’ll be a hidden teleport obscured by boxes (unless someone moved the boxes)
WARNING!:
Teleport is a point of no-return. You’ll not be able to go back via the same path, as it’s one way only. If you have any loot or you drag boxes, make sure to push them before you enter it yourself.
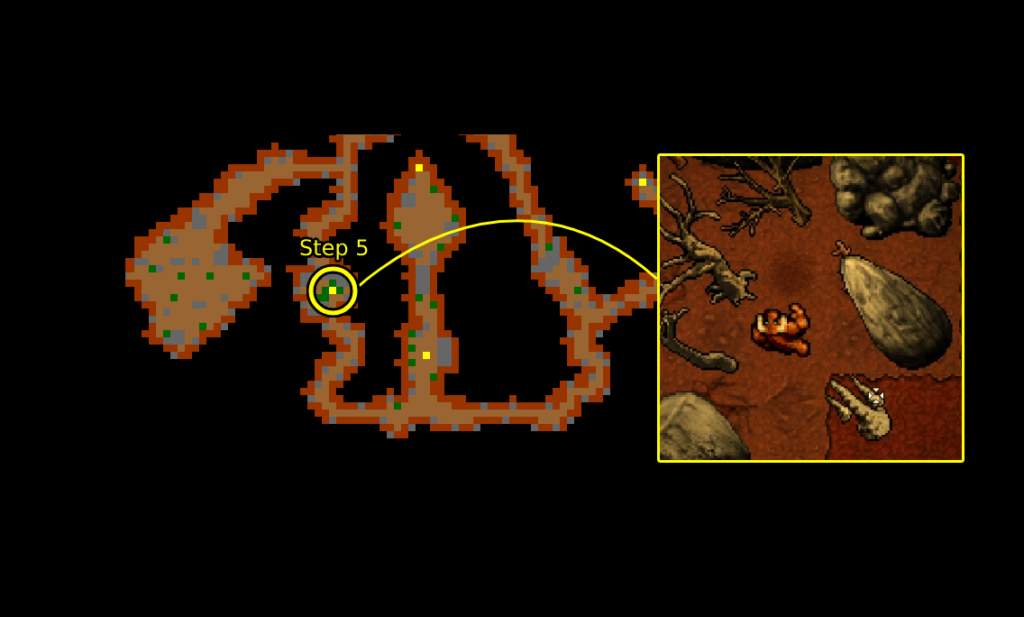
Step 5:
You’ll most likely meet a Rotworm or two right on teleport. Be ready to deal with them.
Now, head south, and left. Follow the corridor till the opening, then once again head west, and then north. It’s very narrow, and there’s plenty of Rotworms, so make sure you do not trap yourself.
Once you’ve made it to the end, rope yourself up.
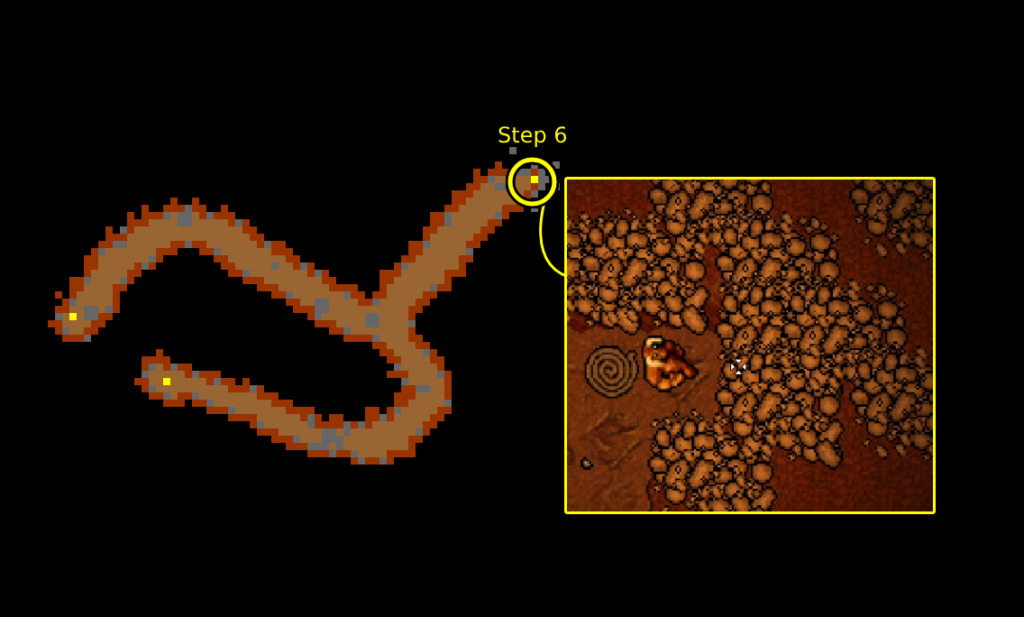
Step 6:
Head right, in this room you’ll have plenty of space to either run, or progress while killing enemies.
Once you are the crossroads, keep to the east. Final rope spot will be in the corner, hidden under rubble.
Final:
You’ve arrived at your destination, and you’ve beat the Maze of Fury!
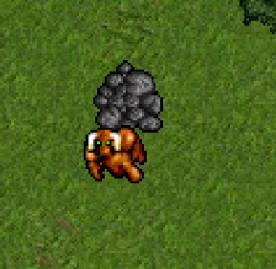
If you wish to return, you’ll find a stone pile near the Magical Wall that’ll lead you back to town.
To keep exploring the island, you’ll need machete… but that’s a different story!
——–Comming soon———
Elven Town -> Longsword Quest
Wolf Elevator -> Shortcut back to main island, skipping the maze.
Cyclops Village -> Finale of Hell Halls quest
Quest Door Level 50 -> Unknown